NutriBullet Blender Replacement Parts: Keeping Your Personal Blender Running
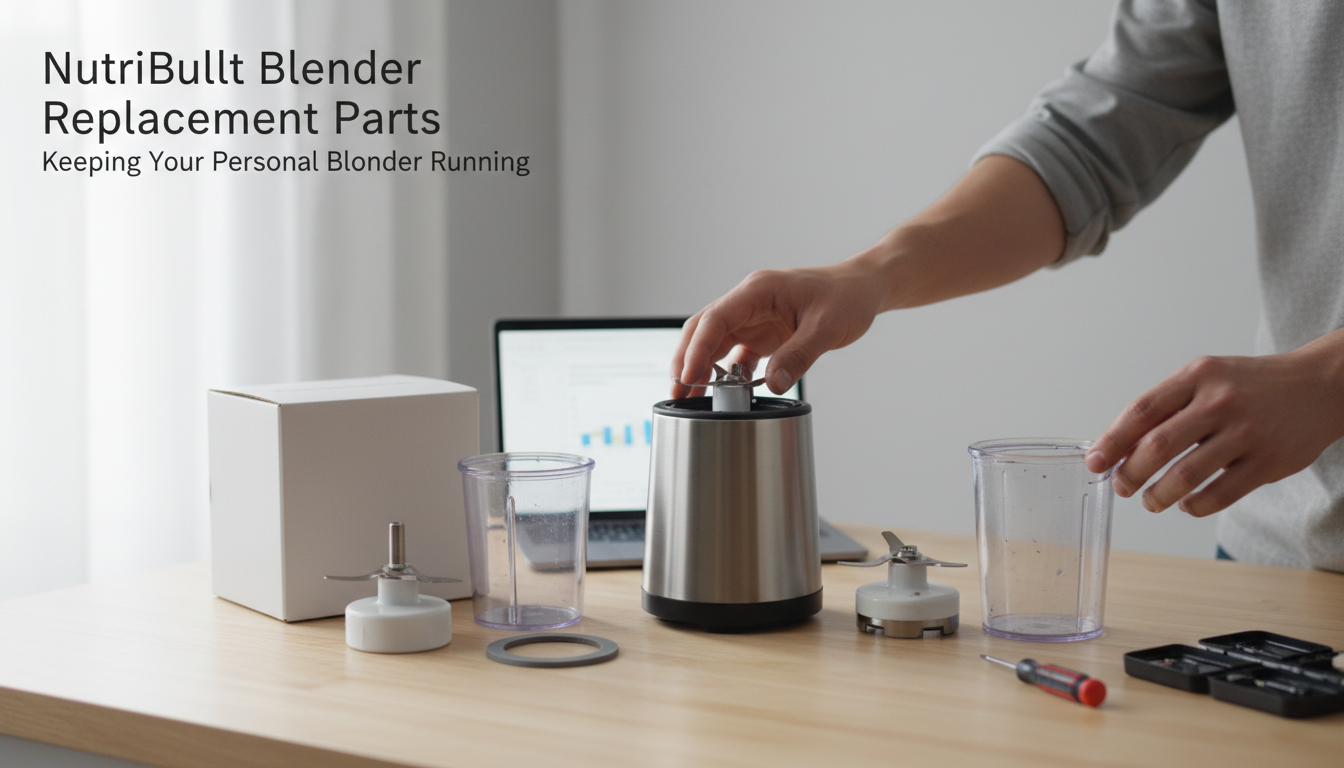
Revitalize Your NutriBullet: A Guide to Essential Replacement Parts
NutriBullet blenders have become a fixture in many kitchens, valued for their compact design and efficiency in preparing smoothies, sauces, and other daily essentials. Their convenience and consistent performance make them a go-to appliance for quick, healthy meal prep.
However, even the most durable and frequently used appliances eventually show signs of wear. Components like extractor blades can dull, cups can crack, and gaskets may degrade, affecting performance or leading to leaks. Recognizing these common issues is the first step toward maintaining your blender's functionality.
This guide aims to equip NutriBullet owners with the knowledge to confidently identify, select, and purchase the correct replacement parts. By focusing on compatibility, assessing quality, and understanding common issues, you can effectively extend the useful lifespan of your existing NutriBullet blender, ensuring it continues to meet your blending needs.
When and Why Your NutriBullet Needs New Parts
Even with regular use and proper care, the moving components and containers of your NutriBullet blender are subject to wear. Recognizing the early signs of degradation can help you replace parts proactively, maintaining performance and preventing more significant issues. Understanding why certain parts fail also guides effective diagnosis.
Common failure points in NutriBullet blenders include:
- Dull Blades: The extractor blades, crucial for breaking down ingredients, can become dull over time. This often happens with frequent use, especially when blending fibrous ingredients, ice, or frozen fruits.
- Signs: Your blender takes longer to achieve a smooth consistency, leaves chunks, or the motor sounds strained.
- Inspection: Visually check the blade edges for nicks, pitting, or a noticeably rounded profile compared to a new blade.
- Leaking Gaskets: The rubber gasket within the blade assembly creates a seal between the blade and the cup. Over time, these gaskets can harden, crack, or become dislodged due to repeated compression, exposure to food acids, or high temperatures.
- Signs: Liquid seeping from the base of the blade assembly during blending, or moisture appearing around the motor base.
- Inspection: Remove the gasket (if removable) and inspect it for any tears, cracks, brittleness, or signs of deformation. Ensure it sits flush and securely in its groove.
- Cracked Cups: The blending cups are made from durable plastic, but they are not impervious to damage. Drops, impacts, or even thermal shock from blending very hot ingredients can lead to stress fractures or cracks.
- Signs: Visible hairline cracks, especially near the rim or base, or a persistent leak that isn't from the blade assembly.
- Inspection: Thoroughly examine the cup's exterior and interior for any visible damage, particularly after an accidental drop.
- Worn Power Base Drive Socket: The drive socket (or gear) on the power base engages with the blade assembly to transfer motor power. This plastic or rubber component can wear down, chip, or break if the blender is overloaded, used with a loose cup, or if the blade assembly itself is worn.
- Signs: The motor runs but the blades don't spin, grinding noises, or the blender fails to activate when the cup is pressed down.
- Inspection: Check the drive socket on the motor base for missing teeth, excessive wear, or damage.
Worn parts not only diminish your blender's effectiveness, leading to less consistent results and increased blending times, but they can also pose safety risks. Leaking fluids can damage the motor or create an electrical hazard, while compromised blade assemblies could potentially detach or fail during operation. Regular visual inspection of these key components is a simple yet effective way to catch issues early and determine when a replacement part is needed.
Navigating NutriBullet Compatibility: Model-Specific Parts Explained
Selecting the correct replacement parts for your NutriBullet blender hinges on understanding its specific model. Unlike some kitchen appliances, NutriBullet components are often not universally interchangeable across their product lines. Using an incompatible part can lead to poor performance, leaks, damage to the blender, or even safety hazards. Each NutriBullet series is engineered with distinct power requirements, cup designs, and blade assemblies.
Key differences exist between popular NutriBullet models:
- NutriBullet 600W and 900W Pro: These are often compatible with a similar range of cups and extractor blades, though specific blade designs might vary. The wattage rating is a primary indicator for blade compatibility.
- NutriBullet Lean (e.g., NB-203 1200W): This model typically requires specific extractor blades and cups designed for its higher wattage and potentially different cup interface. Parts for the 600W or 900W series are generally not compatible.
- NutriBullet RX: This is a distinct, more powerful system with its own unique blade, cup, and motor base design. Its parts are not interchangeable with other NutriBullet models.
- Exclusions: It's important to note that NutriBullet parts are distinct from those designed for the Magic Bullet, which is a separate product line with different dimensions and power specifications.
To confidently identify the parts you need, locate your NutriBullet's model number. This critical identifier is typically found in one of these locations:
- On the bottom of the motor base: Flip the blender over, and look for a sticker or engraved information.
- In the original user manual: The model number is usually listed on the cover or in the specifications section.
- On the original packaging: If you still have it, the model information will be printed there.
The model number often appears as "NB-XXXX" (e.g., NB-101 for the 600W) or will clearly state the wattage (e.g., "900W Pro"). Matching this number to the part's compatibility specifications is the most reliable way to ensure a proper fit and prevent purchasing errors.
Essential NutriBullet Replacement Parts and Their Functions
Understanding the components of your NutriBullet blender is key to identifying which part might need replacement and ensuring you select the correct one. Each piece plays a specific role in the blending process, and wear and tear can impact performance and safety.
-
Extractor Blades These are the working heart of your NutriBullet, responsible for breaking down ingredients. They typically feature stainless steel construction.
- Cross Blades: The most common type, designed for general blending tasks like smoothies, sauces, and crushing ice. They usually have four prongs.
- Milling Blades: Often identifiable by their two prongs, these are specialized for grinding dry, harder ingredients such as nuts, seeds, coffee beans, or oats into flour.
- Replacement Indicators: Look for dullness, bending, chipping, or if the blender struggles to process ingredients efficiently. A grinding noise from the blade assembly without effective blending can also signal wear. Compatibility is crucial; ensure the replacement blade matches your NutriBullet model's wattage (e.g., 600W, 900W, 1200W, or RX series).
-
Cups and Lids NutriBullet cups are designed for direct blending and serving. They are typically made from durable, BPA-free plastic.
- Cup Sizes: Commonly available in various capacities, such as 16 oz, 24 oz, and 32 oz, to suit different serving needs.
- Lid Types:
- Storage Lids: Solid caps used for sealing cups to store blended contents in the refrigerator.
- Resealable/Travel Lids: Often feature a flip-top or spout for convenient drinking on the go.
- Replacement Indicators: Cracks, cloudiness, persistent odors that cannot be washed away, or damage to the small tabs on the cup's rim (which engage the blender's activation mechanism) are reasons for replacement.
-
Gaskets and Seals These small but critical rubber rings are essential for preventing leaks during operation.
- Function: A gasket typically sits within the extractor blade assembly, creating a watertight seal between the blade and the cup.
- Inspection: Regularly check the gasket for any signs of tearing, cracking, stretching, or hardening. A leaking blender, especially from the base of the blade assembly, is a primary indicator of a compromised seal.
- Replacement: While some gaskets are replaceable individually, they are often integrated into new blade assemblies. Ensure the replacement gasket or blade assembly is compatible with your specific NutriBullet model.
-
Less Common Replacements While blades, cups, and seals are frequently replaced, other parts can also experience issues.
- Power Bases and Gears: The power base houses the motor and internal gears that drive the blades. Issues like the blender failing to turn on, emitting burning smells, or making unusual grinding noises could indicate a problem with the motor or internal gears.
- Professional Service: For complex internal electrical or mechanical failures within the power base, self-repair is generally not advised due to safety concerns. In such cases, evaluating the cost of professional repair against purchasing a new unit is often the most practical approach.
Making the Right Choice: Key Considerations for Buying Replacement Parts
Selecting the correct replacement parts for your NutriBullet involves more than just finding a match; it requires an understanding of compatibility, material integrity, and vendor reliability. Informed decisions can significantly extend your blender's life and ensure continued performance.
-
Original Equipment Manufacturer (OEM) vs. Aftermarket Parts When sourcing replacement components, you'll encounter two primary categories: OEM parts and aftermarket alternatives. Each presents distinct advantages and trade-offs.
-
OEM Parts: These are manufactured by NutriBullet or under their direct authorization.
- Pros: Generally offer guaranteed compatibility and fit, consistent material quality, and adherence to original specifications. They often come with the assurance of the brand.
- Cons: Typically higher in price compared to aftermarket options. Availability might be limited to official channels or authorized retailers.
- Trade-off: You pay a premium for assured fit and quality, potentially reducing the risk of incompatibility or premature failure.
-
Aftermarket Parts: Produced by third-party manufacturers, these parts are designed to be compatible with NutriBullet blenders.
- Pros: Often more budget-friendly, providing a lower-cost alternative to OEM parts. A wider variety of sellers and availability might exist.
- Cons: Quality can vary significantly between manufacturers. There's a risk of imperfect fit, material differences, or reduced durability, which could lead to leaks or operational issues. Compatibility claims may not always be precise for all NutriBullet models.
- Trade-off: Potential cost savings are balanced against the need for careful vetting to ensure acceptable quality and fit, as a poor-quality part could compromise your blender.
-
-
Material Quality and Durability The longevity of a replacement part directly correlates with its material quality. For components like blades, look for stainless steel construction to resist corrosion and maintain sharpness. Cups should be made from durable, food-grade plastic that can withstand repeated blending cycles without cracking or clouding. Gaskets and seals require flexible, resilient rubber or silicone to maintain a watertight seal over time. Inferior materials can lead to premature wear, leaks, or even affect blending efficiency.
-
Seller Reputation and Product Reviews Especially when considering aftermarket options, scrutinizing the seller's reputation and product reviews is a critical step. Look for consistent positive feedback regarding product accuracy, durability, and customer service. Pay close attention to reviews that mention specific NutriBullet models and detail any issues with fit, leaks, or material breakdown. A pattern of complaints about a particular part or seller can indicate potential risks.
-
Understanding Return Policies and Customer Support Before finalizing a purchase, familiarize yourself with the seller's return policy. A clear and reasonable return process provides a safety net if the part is incompatible, defective, or not as described. Reputable sellers often offer accessible customer support to address questions about compatibility or installation. This can be invaluable, particularly for aftermarket parts where fitment might be less guaranteed than with OEM options.
Troubleshooting, Maintenance, and Longevity: Keeping Your NutriBullet Running Smoothly
Replacing a NutriBullet part can extend your blender's life, but understanding potential pitfalls and implementing proper care is crucial. Incorrect installation or neglecting routine maintenance can lead to new issues, compromise safety, or shorten the lifespan of both new parts and the blender itself.
Addressing Installation Risks
Even with the correct part, improper installation can lead to immediate problems.
- Leaks: The most common issue arises from an improperly seated or damaged gasket, or a blade assembly not screwed tightly onto the cup. Ensure the gasket is flat and free of tears before assembling. When attaching the blade, twist it firmly until snug, but avoid overtightening, which can stress the plastic.
- Blender Not Activating: If your NutriBullet doesn't turn on after replacing a cup or blade, check the small activation tabs on the cup's rim. If these are damaged or not aligning correctly with the power base, the blender's safety mechanism will prevent it from starting. Also, confirm the power base is plugged into a functional outlet.
When Malfunctions Persist
If your NutriBullet continues to malfunction after a part replacement, consider these steps:
- Re-evaluate Compatibility: Double-check that the replacement part is precisely compatible with your NutriBullet model. Even subtle differences can cause issues.
- Inspect Other Components: A new blade won't fix a worn motor. Listen for unusual noises from the power base or check for any burning smells, which can indicate motor strain or electrical issues.
- Power Base Integrity: Ensure the power base itself is free of cracks, debris, or damage to the internal activation pins. Sometimes, the problem lies with the core unit, not the peripheral parts.
Deciding on Further Action
There comes a point where continued part replacement may not be the most practical or economical solution.
- Consider Professional Repair: For issues like motor failure, persistent electrical problems, or if the unit emits smoke or burning smells, professional repair might be an option, but it's often more cost-effective for larger, more complex appliances.
- Full Blender Replacement: If the cost of multiple replacement parts approaches the price of a new NutriBullet, or if the power base exhibits significant wear, persistent electrical faults, or motor degradation, investing in a new unit is often the more sensible long-term decision. This is especially true if safety is a concern.
Preventing Wear and Tear
Proactive maintenance significantly extends the life of your NutriBullet and its components.
- Avoid Overfilling: Do not fill cups beyond the "Max" line. Overfilling puts excessive strain on the motor and blade, accelerating wear.
- No Hot Liquids: NutriBullet blenders are not designed for blending hot liquids. The pressure buildup from steam can cause the cup or blade assembly to burst, posing a safety risk.
- Limit Blending Time: Avoid continuous blending for extended periods. Give the motor short breaks, especially when processing tough ingredients, to prevent overheating.
- Proper Storage: Store cups and blades separately or loosely assembled to prevent gaskets from compressing and losing their seal prematurely.
Routine Inspection and Cleaning
Regular checks and proper cleaning can catch issues early and prevent costly damage.
- Blade Assembly: After each use, disassemble the blade and cup. Wash the blade carefully, paying attention to the underside where residue can accumulate. Periodically inspect the blade edges for dullness, chips, or cracks.
- Gaskets: Remove gaskets from the blade assembly for thorough cleaning to prevent mold or odor buildup. Check for stretching, cracking, or hardening, which are signs it needs replacement.
- Cups: Wash cups immediately after use. Avoid abrasive cleaners or scouring pads that can scratch the plastic, leading to cloudiness or micro-cracks.
- Power Base: Wipe down the power base with a damp cloth, ensuring no liquids seep into the motor housing. Inspect the activation pins and motor-engagement area for debris or damage.
Frequently Asked Questions About NutriBullet Replacement Parts
Understanding the nuances of NutriBullet replacement parts can sometimes lead to specific questions. Addressing these common concerns can help owners make informed decisions to maintain their appliance.
-
How often should NutriBullet blades be replaced? The lifespan of a NutriBullet blade assembly depends heavily on usage frequency and what is being blended. Over time, blades can become dull, reducing blending efficiency, or the integrated rubber gasket can wear, tear, or rip, leading to leaks. While there's no universal fixed schedule, signs like decreased performance, visible wear on the blades, or persistent leaks often indicate it's time for a replacement. For heavy daily users, replacement every 6 months to a year might be necessary, whereas occasional users might find their blades last 18-24 months or longer. Regular inspection for cracks or damage is also advised.
-
Are all NutriBullet cups interchangeable? No, NutriBullet cups are generally not universally interchangeable across all models. Different NutriBullet series, such as the 600W, 900W Pro, Lean, or RX, often feature distinct cup designs, threading, and locking mechanisms. Attempting to use a cup from an incompatible model may result in improper sealing, leaks, or the blender not activating. Always verify the compatibility of a replacement cup with your specific NutriBullet model number, typically found on the bottom of the motor base.
-
Can I use replacement parts from other brands with my NutriBullet? It is generally not recommended to use replacement parts designed for other blender brands with your NutriBullet. NutriBullet components are engineered to specific dimensions, materials, and safety standards for their own models. Parts from different blender manufacturers are unlikely to fit correctly, can compromise performance, and may even pose safety risks due to improper function or material incompatibility. When seeking replacement parts, prioritize those explicitly stated as compatible with your NutriBullet model.
-
What if my NutriBullet still leaks after replacing the gasket? If your NutriBullet continues to leak even after replacing the gasket (which is typically part of the blade assembly), several other factors could be at play. First, ensure the extractor blade assembly is screwed onto the cup tightly and correctly. Second, inspect the cup itself for any hairline cracks, especially around the rim or base, as these can be a source of leaks. Third, confirm that the cup is properly secured and seated into the power base, ensuring all tabs align correctly. Lastly, check the motor base's sealing mechanism for any obstructions or damage that might prevent a proper seal with the cup.
Keep Blending Strong: Your Guide to NutriBullet Part Success
Successfully navigating the world of NutriBullet replacement parts hinges on two critical factors: ensuring compatibility and prioritizing quality. An informed approach to selecting components, from extractor blades to gaskets, directly impacts your blender's performance and lifespan. Verifying your specific NutriBullet model and wattage before purchase is the most reliable way to guarantee a proper fit and function, preventing potential damage or leaks.
Beyond initial selection, proactive maintenance plays a significant role in extending your blender's utility. Regularly inspecting parts for signs of wear—such as dull blades, cracked cups, or stretched gaskets—and replacing them promptly can prevent minor issues from escalating into major malfunctions. This vigilance helps maintain optimal blending efficiency and safeguards the motor from unnecessary strain.
Ultimately, investing thoughtfully in the correct NutriBullet replacement parts is an economical and sustainable choice. It empowers you to restore your appliance to peak condition, allowing you to continue enjoying its convenience and performance without the need for a full replacement. This commitment to maintenance not only saves resources but also prolongs the life of a valuable kitchen tool.
More in Blender Replacement Parts
View All
Ninja 1500-Watt Blender Replacement Parts: Maintaining High-Power Performance